Introduction
Having trouble creating good tutorials? Then this post is for you! (And the guys that usually explain you how to draw as well)
Hey guys! In this new section called “Game Design” (wow, we are so original), we’ll be talking about different aspects of game design. Before we start, I would like to give you a heads up, we are not super veterans in this matter, so I can’t tell you that everything I say here is 100% true. However!! I do believe that some people might find this information useful, and this is what I’ve learnt so far, so why not share it with everyone right?
Tutorials
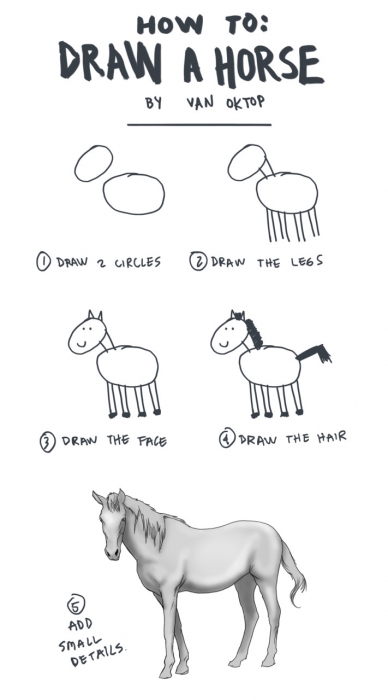
It’s a hot topic nowadays to talk about how bad some tutorials are, specially in big games, and how they should be. Often, good designers point out games like Mario, and Megaman because they have awesome tutorials. You don’t even notice they are tutorials! So before I say tutorial one more time, I’ll better begin with our case study. This time, we’ll be talking about “Wake up Amy!” , a game we are developing here at Bigfoot. We’ll go through the first 3 levels of the game, to see how the user will learn the basics while playing, and the experienced users will play it through while still having some fun in the process.
Level 1
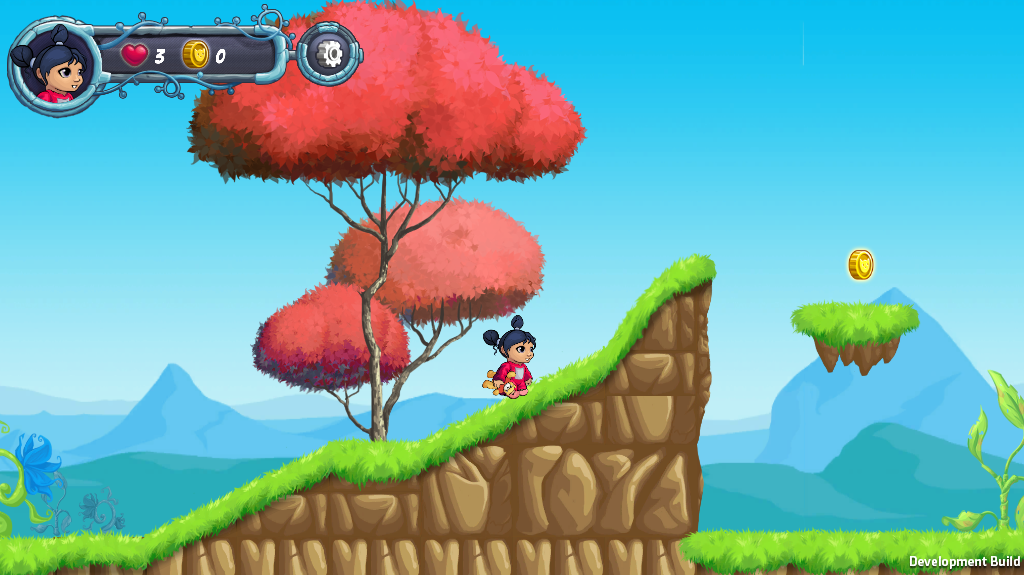
This is the first thing that the player will see
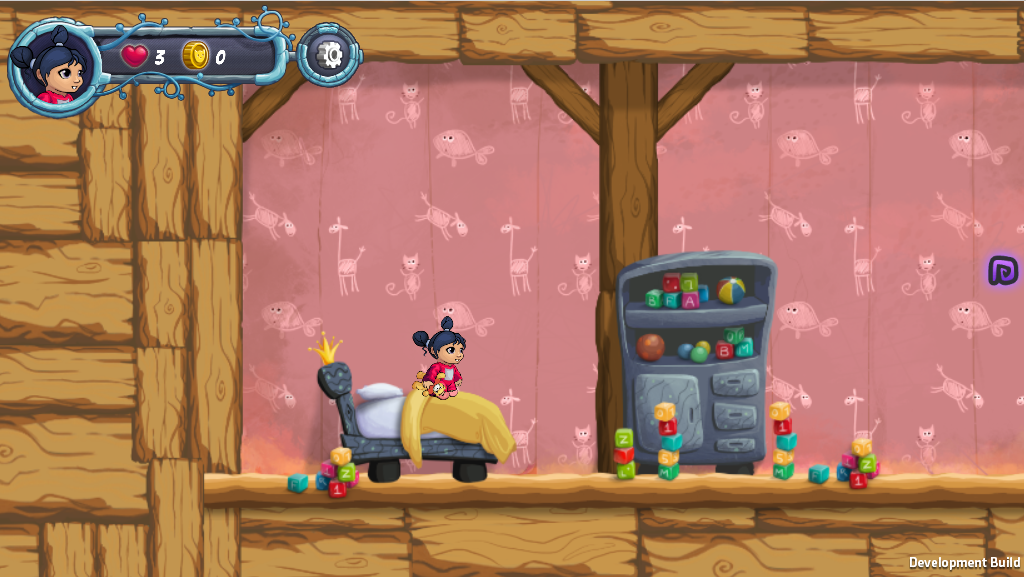
A lot of times when people play the game in front of me, I see them stare at the screen like saying “What do I do now?” . As soon as they ask themselves that question, the keys for moving appear
This is the 1st lesson they learn. How to move. I decided to make them look at the screen for exactly 2 seconds before this appears, for some reasons:
1. Because I want them to just stare at the game. Since we are telling a story, I want the users to submerge into this world before they start playing.
2. Because once they start asking themselves how to play, they will be looking for an answer, and that way, as soon as the text appears, they will see it, and understand that the game is helping them.
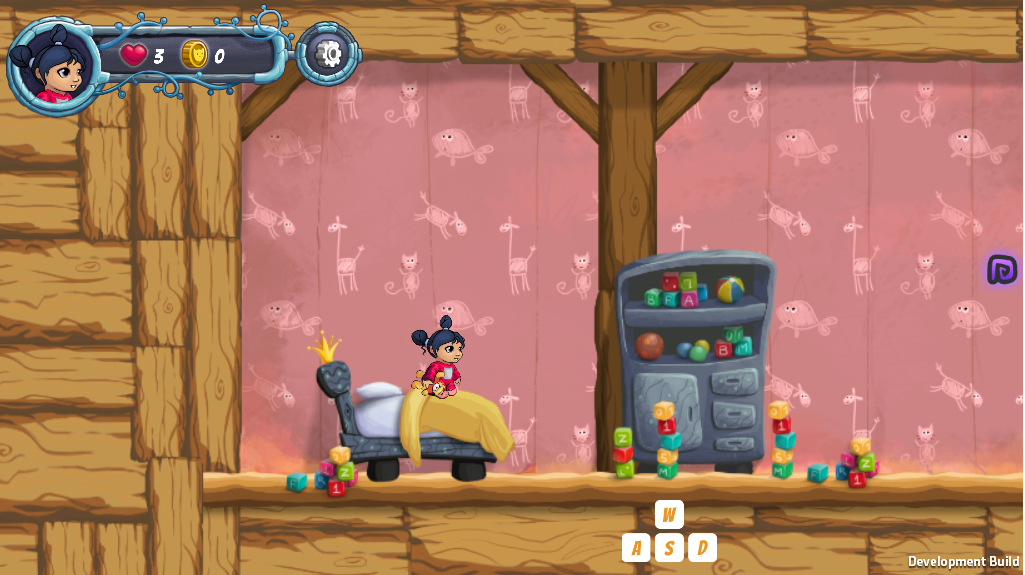
I didn’t want anything to be explicitly explained. So having this popping up, encourages the player to try things out on their own. Once they press those keys, they will start moving. Some players, will try out the W key as well, and find out you can jump with it, but just in case they didn’t, once they get under that rune, another tutorial will pop up, that will teach the user that he can jump with the space bar as well.
This is strategically placed here, so the user will stop to think, “why do I have to use the space bar?”, and when they do, they will take the rune that will open the door. So the user so far has learned 2 things. One, he can jump with space bar (If he knew he could jump with w, he also knows now, that he can use the space bar as well) and two, you can open doors with runes.
When designing a tutorial, you also have to think, what would happen if the user didn’t get the hints. How can they continue? What could they do instead?
In this particular case, by placing the purple rune, right in the middle of the screen, with nothing around it, you can see it easily. It also has the same shape as the rune at the door, but with a different color. And it has the same color as the door, which means they relate somehow. Even if the player doesn’t jump, he will get stuck, and the door will stop his way out. So he will figure out one way or another, that he has to jump in order to get that rune, and it will open the door.
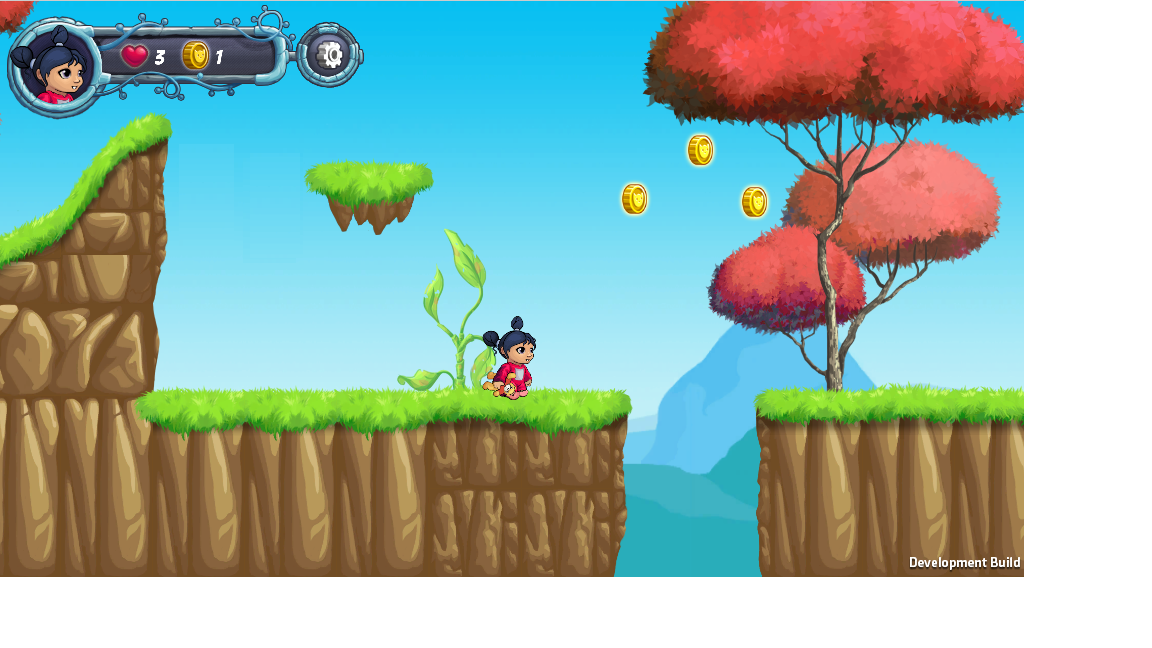
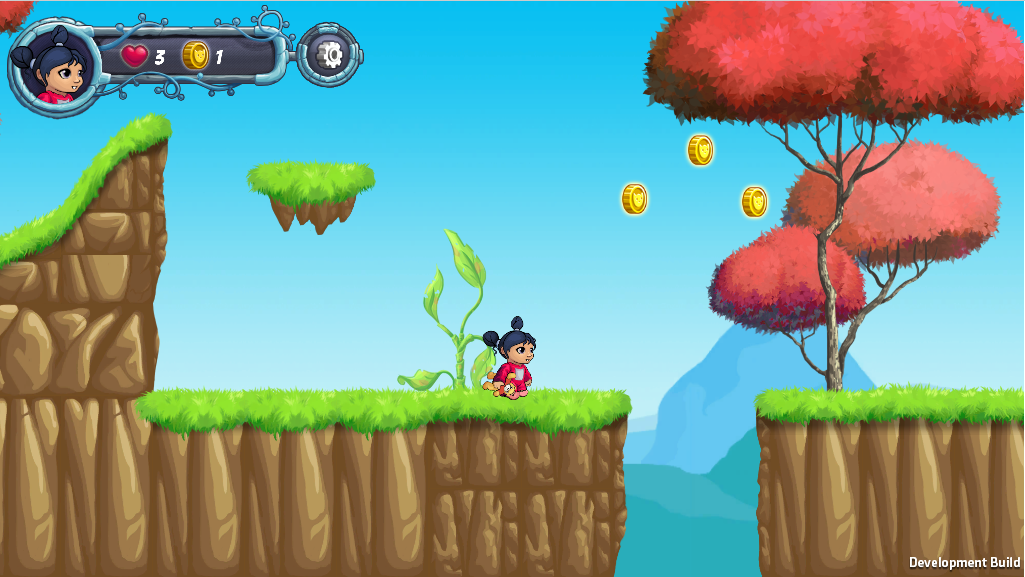
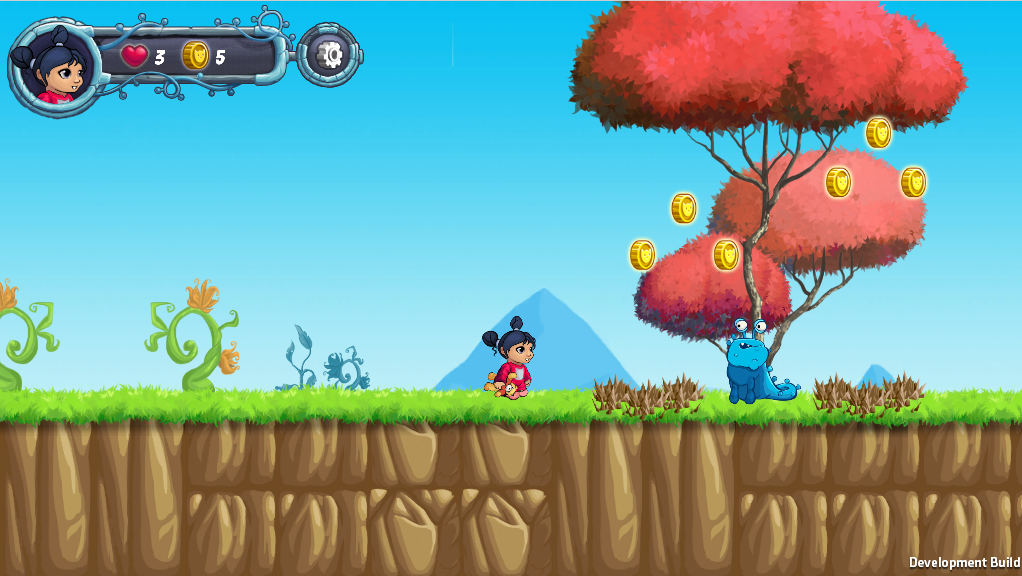
Once you are out, you are free to test the movement buttons. You will climb a hill, find some decoration, coins, platforms, everything in the first seconds of playing.
Most of the times, the player won’t even notice that he is learning. But as soon as they pass through the tree, subconsciously he just learn that the vegetation is just decoration and don’t interfere with the gameplay. Also, he just climbed a hill, and is about to jump from a high place. After doing that, he will realize (subconsciously again) that he won’t die because of it. And the best thing of all, he is already moving, jumping around, playing your game.
You can see now, a single coin, on top of a platform. Every human wants money so, of course, you will try to get it!! And as soon as you get it, you will realize that you can step on the platforms, and earn some coin as well ![]()
Trial and Error
This is very important. Always see how people react to your tutorials, before releasing a game. By watching people play it, you will learn a lot of things, specially how they react to it. I faced with an issue here because of the position of this platform. At first it was placed here:
From this point of view, you can see that this is a really important jump. If they do it wrong, they will die for the first time, and if they do it right, you will be absolutely sure they learn how to move around. What was the problem? If they jumped from the hill to the platform, and then jump from the platform to the other side, they will fall, and die, painfully.
Picture this. You are trying a game for the first time, you just learn how to move, jump, you open a door, everything goes smoothly, you climb a hill, jump to a platform thinking “Oh man I’m so good at this , I’ll just jump from the platform to the other side like a boss!!” but nope. You die, and then say “Okay, let’s try another game”.
It’s okay if you die, because you are learning, but to die, because some bad designer put that in the wrong place? that’s not nice at all. So I moved it just a little bit, so everyone can get the 1st coin of the game, even the newbies, and the experienced players won’t die if they jump from the first platform
Once you jump to the other side, you will face your first enemy.
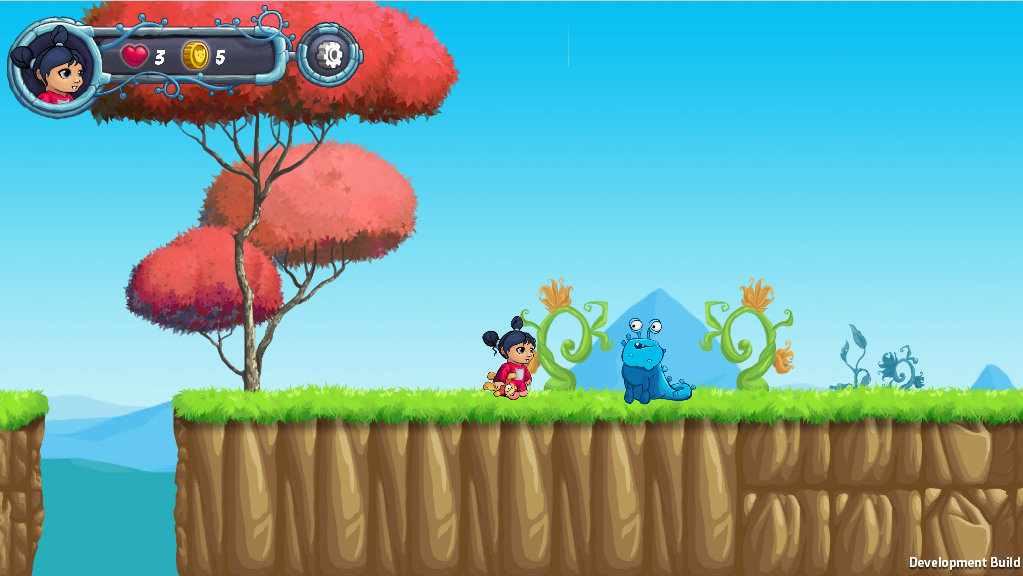
Let’s leave the art behind for this post, but I just want to say, that we placed a placeholder art here, with an enemy that had spikes on their head. So everyone tried to jump over it, instead of trying to jump on top of it. So the look of the enemies is important. Here it seems really harmless, you could even think is not an enemy. But most of the people will try to jump on it (we’ll see in a few seconds that even if they don’t, they will realize later that is an enemy) .
Here the enemy is standing alone, and you have plenty of space to try jump above him, or on top of him. If you do jump on top of him, you will kill it (yay!) but if not, you will continue only to face this:
Notice three things here
1. There are some sharpie things in the ground, spikes, they probably hurt right? of course!
2. If you didn’t kill the previous enemy, you don’t have much choice but to land on top of it now, so you will kill it anyways!
3. If you pay attention, by the placement of the coins, you could already suggest to the experienced players, that they could do a double jump here to get all the coins. And if they don’t you will see that you can’t reach some of them, so something is a little off.
This part is somewhat difficult. There is a really good chance they hit the spikes, the enemy, or whatever before reaching to the other side, and that’s because I need them to get hurt, to know that they can get hit and not die, and later on, that they can heal.
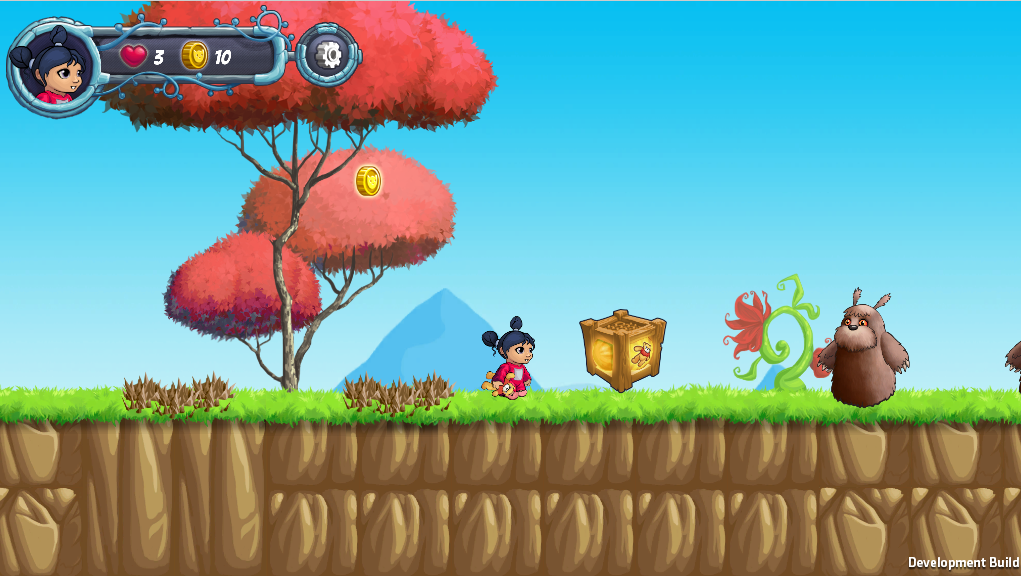
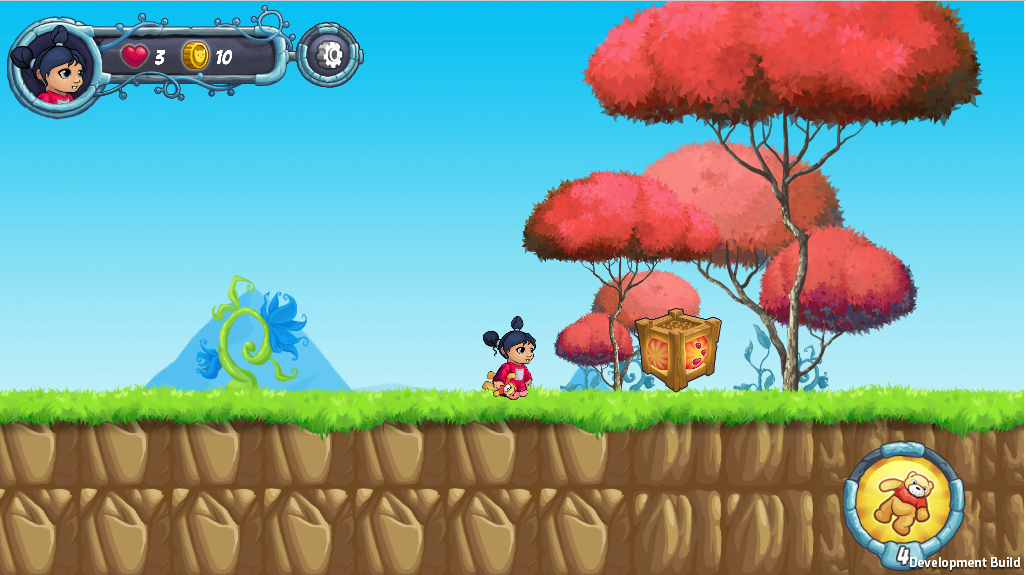
First PowerUp : Bears
Once you get to the other side of that nightmare, you will find a box in front of you, with a bear icon in it. This tells the user that’s a friendly box, since Amy is already holding a bear, and come on, what could possibly go wrong if you open a box with a Teddy Bear inside? So we can be sure, that the user will jump on it, or just touch it somehow.
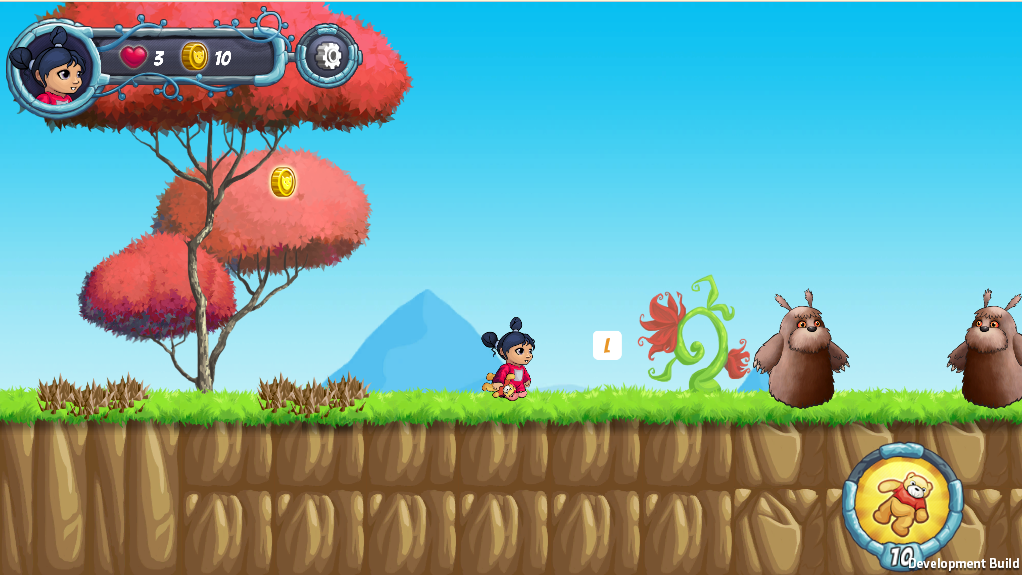
Once he does that, a letter L will show up, and a Bear icon with a number as well (You actually get 10 bears from that box, not 31). Now, the user is in the perfect position to try several things out. In the mobile version, the L won’t appear, so he will just try to press the bear. In the web version, the user will try pressing L and he will throw his first bear! yay!
What did he learn in the last seconds?
1. Boxes give you stuff, so they are good. In this case, it gave you 10 bears!
2. You have a limited amount of bears! You just threw one, and the number went down!
3. You can kill enemies with bears! The positioning of this first box, is really important, since is just in a place where the user is not in danger (The enemy can’t kill him because it turns around before reaching him) , so he can take his time to search for the letter L or think what to do. And when he presses it, the bear will always hit the enemy, so he will learn that he can kill him as well!
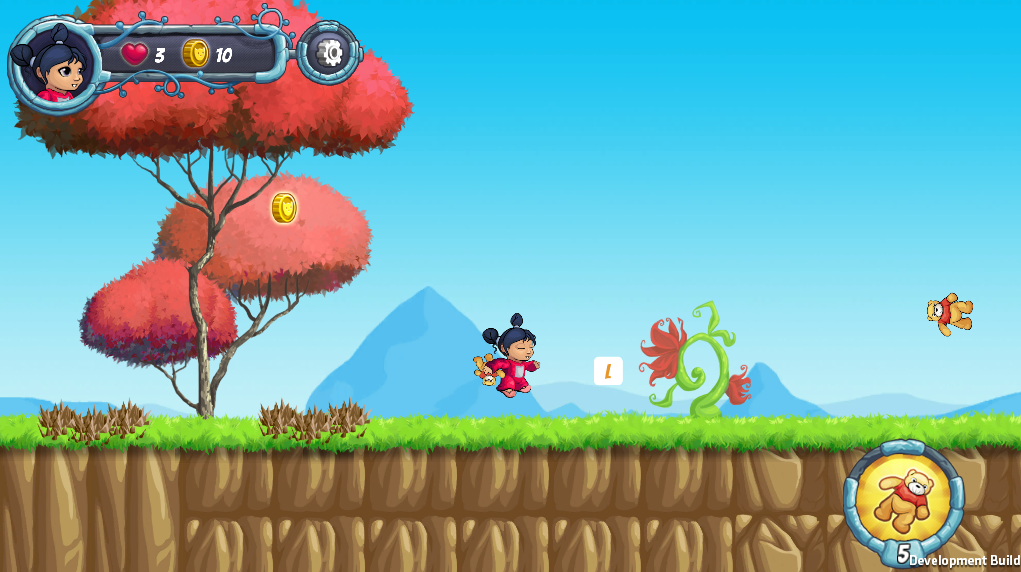
Second PowerUp : Heal
After killing all the enemies, the user will find another box, he knows it gives you cool stuff, so tries to touch it. Again another button and key show up, so we try them out.
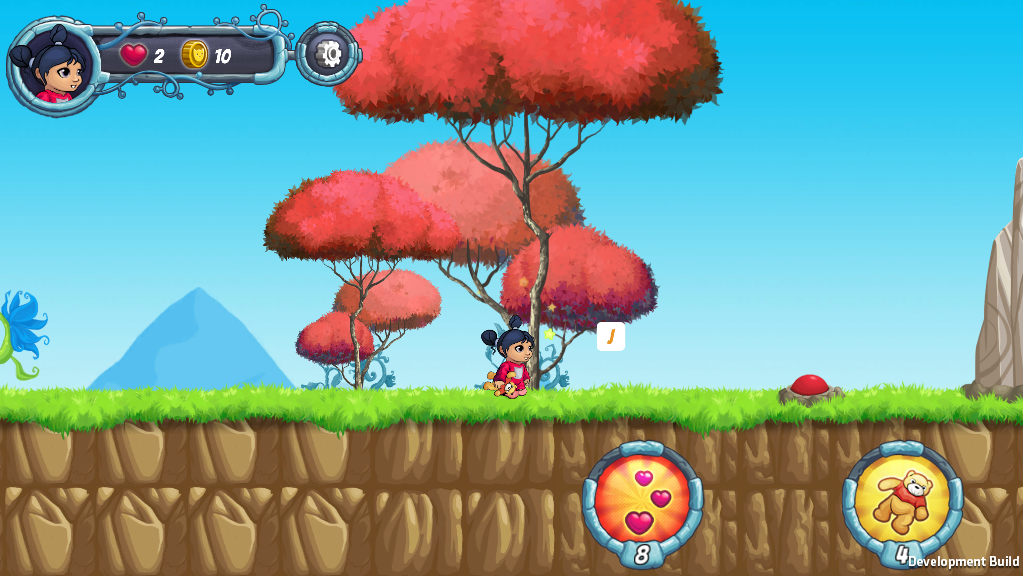
Remember those spikes, with the 2nd enemy in the middle, where almost every user will lose a heart? Well, basically, is so they can heal now! You can’t heal if you are full HP. So having a hard time before reaching here was a must, so the user is able to test this power up. Once he presses it, he will gain a heart back, and like the bears, the number will go down (You also gain 10 heals the first time, not 44 like the pic shows)
Third PowerUp : Shield + Buttons
In the previous picture, we can already see that there’s a button, a “wall” made of stone, and a box on the other side. Now, we’ll introduce the player to some basic mechanics of the game. Pressing buttons, will activate things in the game, so how do we teach that to them?
Here, we placed a button, and a wall. If the user jumps it, and tries to jump the wall, he won’t be able to grab the next box. So the most common thing to do is take the risk, and jump on the button. As soon as the user does that, the wall goes down, and he is able to pass. Next time he sees a button, he’ll press it just to see what happens. 100% guaranteed ![]()
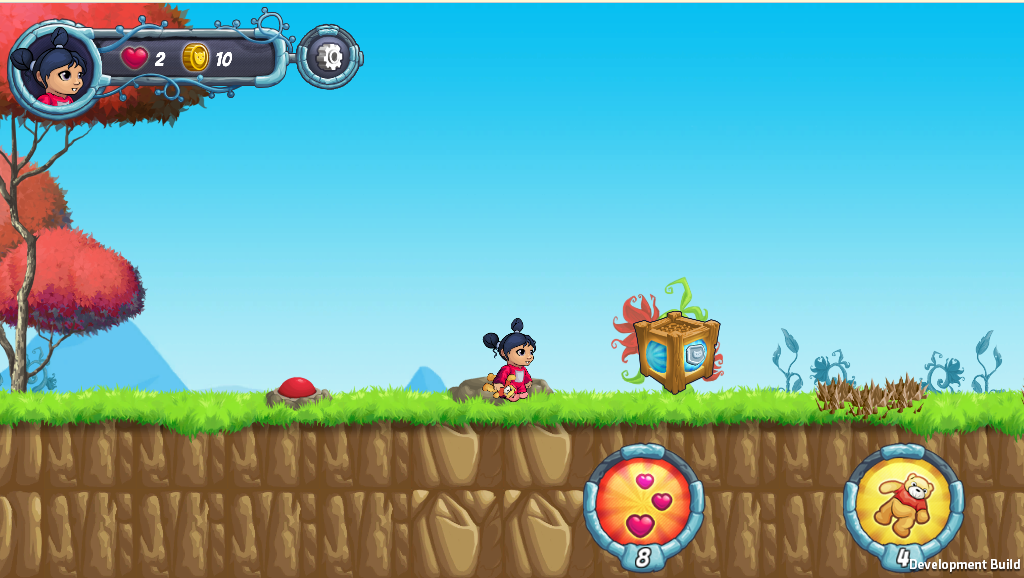
Now that the user solved this little puzzle, let’s reward him with another powerup ! the shield!
Again, the K key shows up, and another icon with another 10 (He gets 10 shields, not 63) on it. Ahead, some tricky jumps await us, and is very likely the user will lose some hearts trying to get to the other side. But he just discovered another powerup, why not try it out?
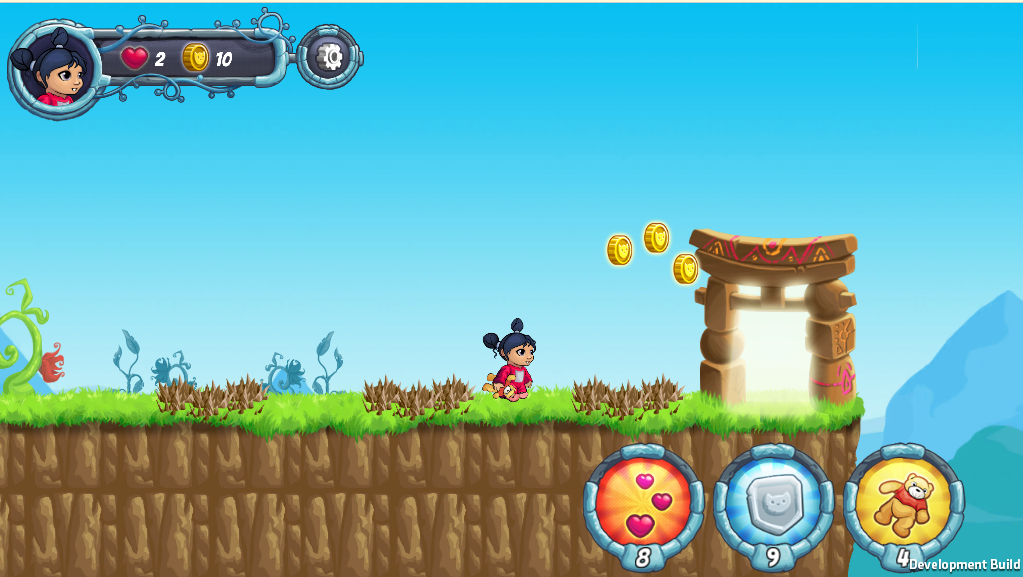
A bubble will appear around Amy, and even if the player doesn’t know what does it do, he will just move forward to continue, and once he steps on a spike, he will realize that a heart wasn’t taken from them, and that this big bubble around you protects you from one hit. This is also reinforced by sounds and animations, to make sure the user understands what is happening.
Once he gets to the other side, the last jump doesn’t give you any other choice, but to get inside that shiny door, and guess what? That marks the end of the level! So that’s it, the user now knows what to look for to complete each level!
Level recap
Okay, let’s recap a little bit. We saw a lot of things happening in the first minutes of the game. And although this might seem too much information for the player in such a short amount of time, since they are learning while they play, they won’t forget most of this things!
What’s important of this first post about tutorials, is that the user has to learn how to play your game, while they actually play your game. Don’t try to throw a wall of text at them, because they won’t even read it. Don’t try to explain every rule, because they won’t get them. Try to put yourself in their position, and imagine what would you do, if you didn’t know how things work? What will happen if the user doesn’t follow your hints? how can you make sure they do what you want them to do?
Test your tutorials. Ask people who have never played your game before, and watch them play it through. If they turn around to ask you something, then you failed. Learn to watch them, and pay attention to how they react, see the expressions in their faces. I found frustration in some of them when they died when jumping from that first platform. I found out that some people didn’t realize you could kill enemies by jumping on top of them ,only because they had spikes on their heads! After playing the first level, ask them what they’ve learned so far. Did he learn at least the basic controls? Can he play level 2 with what he just learnt?
Also, when you can, introduce new mechanics in a cool way, and reward them for doing things right! Hey you learn how to use buttons and you got through that wall! Here, have some shields! Notice also, that we didn’t overwhelmed the player, with the 3 power ups at once, and with the movement mechanics, we introduced them one by one, and the user was able to test them out as soon as they discovered them! Make it engaging, and fun!
After all, the first minutes of play, will decide if the user likes your game or not!
Thanks!
That’s it for today! Thanks for reading, don’t forget to subscribe at the top of the blog, stay tuned!
Also, don’t forget to leave us comments, and let us know what you think ! What would you do different? Do you think users will have trouble learning all of this?
Thanks for reading, and see you next week!